Description
Get spooky and creative this Halloween with these 12 fun pumpkin carving ideas! From classic Jack-O’-Lanterns to glam floral pumpkins, each design comes with a simple how-to and pro tip for perfect results.
Ingredients
Scale
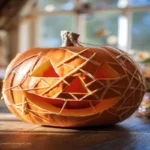
- 1. Spider Web Pumpkin — Draw intersecting lines and carve out thin webs for a creepy-cute spider effect. 🕸️ Tip: Add a small plastic spider to finish the look.
- 2. Classic Jack-O’-Lantern Smile — Nothing beats the original. Triangle eyes and a toothy grin are timeless. 🕯️ Tip: Use LED candles for safety and long glow.
- 3. Starry Night Pumpkin — Use cookie cutters to punch star holes all around the pumpkin. ✨ Tip: Spray a light coat of glitter for extra sparkle.
- 4. Bat Silhouette Pumpkin — Stencil flying bats across the pumpkin’s face. 🌑 Tip: Outline in marker first for precision.
- 5. Witch Hat Pumpkin Stack — Stack two pumpkins — one carved, one wearing a paper witch hat! 🎩 Tip: Paint the bottom pumpkin black for contrast.
- 6. Bloody Drip Pumpkin — Use red paint or candle wax to create a spooky “melting blood” effect. 💀 Tip: Perfect for horror-themed parties.
- 7. Candle-Holder Pumpkin — Cut several small holes for tealights or fairy lights to shine through. ✨ Tip: Use mini pumpkins for a dining table centerpiece.
- 8. Black Cat Silhouette — Carve a sleek cat with glowing eyes. 🐾 Tip: Spray paint the pumpkin black before carving.
- 9. Floral Pumpkin Design — Drill circular holes and fill with faux flowers or dried blooms. 🌸 Tip: Perfect for fall weddings or feminine Halloween décor.
- 10. Monster Mouth Pumpkin — Carve a wide grin and fill it with fake vampire teeth. 🧛 Tip: Add LED red lights inside for a frightful glow.
- 11. Owl Eyes Pumpkin — Use cookie cutters to shape big round eyes and carve feathers. 🪶 Tip: Glue on real feathers for a 3D look.
- 12. Glow-Through Stencil Pumpkin — Instead of cutting through, scrape the pumpkin’s skin to make glowing designs. 🔥 Tip: Great for intricate logos or words like “BOO” or “WELCOME”.
Instructions
- Step 1: Choose your pumpkin type and size based on your design — smooth pumpkins are best for stencils, while round ones are perfect for traditional faces.
- Step 2: Clean out the pumpkin completely using a scoop or spoon — make sure to remove all seeds and fibers.
- Step 3: Sketch or trace your chosen design with a washable marker for accuracy.
- Step 4: Use small, serrated pumpkin carving tools for precision when cutting.
- Step 5: Add finishing touches like paint, glitter, or accessories for extra flair.
- Step 6: Light your pumpkin safely using LED candles or fairy lights for a long-lasting glow.
Notes
Mix and match carving ideas for a fun Halloween display! Keep pumpkins fresh longer by coating carved edges with petroleum jelly or vegetable oil.
- Prep Time: Varies per design
- Cook Time: —
- Category: DIY & Decor
- Method: Carving & Decorating
- Cuisine: Seasonal Halloween
Nutrition
- Serving Size: N/A
- Calories: 0
- Sugar: 0g
- Sodium: 0mg
- Fat: 0g
- Saturated Fat: 0g
- Unsaturated Fat: 0g
- Trans Fat: 0g
- Carbohydrates: 0g
- Fiber: 0g
- Protein: 0g
- Cholesterol: 0mg