Description
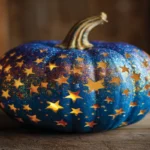
Learn how to carve the perfect Halloween pumpkin using free printable stencils! Follow these simple steps for clean lines, glowing designs, and mess-free results.
Ingredients
Scale
- 1. Choose Your Design — Visit inasrecipes.com/free-pumpkin-stencils and pick your favorite pattern. Print it on regular paper (8.5×11 inch).
- 2. Prepare Your Pumpkin — Wash and dry the pumpkin. Cut off the top, remove seeds, and scrape the inside until smooth and dry.
- 3. Attach the Stencil — Tape the stencil firmly around the pumpkin. For curved surfaces, make small cuts in the paper to adjust the fit.
- 4. Transfer the Design — Use a pin or thumbtack to poke holes along the stencil lines. Remove the paper to reveal dotted outlines.
- 5. Start Carving — Cut slowly along the dotted lines using small, controlled strokes. Remove small pieces first, then the larger ones.
- 6. Light It Up — Insert a small LED candle or fairy lights. Turn off the lights — and watch your pumpkin glow! ✨
Instructions
- Choose Your Design: Scroll through the free stencil collection on inasrecipes.com/free-pumpkin-stencils and pick your favorite. Print it on regular paper (8.5×11 inch).
- Prepare Your Pumpkin: Wash and dry the pumpkin. Cut off the top and remove seeds. Scrape the inside until smooth and dry.
- Attach the Stencil: Tape the stencil firmly around the pumpkin. For curved surfaces, make small paper cuts to adjust the fit.
- Transfer the Design: Use a pin or thumbtack to poke holes along the stencil lines. Remove the paper to reveal dotted outlines.
- Start Carving: Cut slowly along the dotted lines using small, controlled strokes. Remove small pieces first, then the larger ones.
- Light It Up: Insert a small LED candle or fairy lights. Turn off the lights — and watch your pumpkin glow! ✨
Notes
For safety, always carve with small serrated pumpkin tools, not kitchen knives. Keep your pumpkin fresher longer by coating cut edges with petroleum jelly.
- Prep Time: 15 minutes
- Cook Time: —
- Category: DIY & Decor
- Method: Carving
- Cuisine: Seasonal Halloween
Nutrition
- Serving Size: N/A
- Calories: 0
- Sugar: 0g
- Sodium: 0mg
- Fat: 0g
- Saturated Fat: 0g
- Unsaturated Fat: 0g
- Trans Fat: 0g
- Carbohydrates: 0g
- Fiber: 0g
- Protein: 0g
- Cholesterol: 0mg