
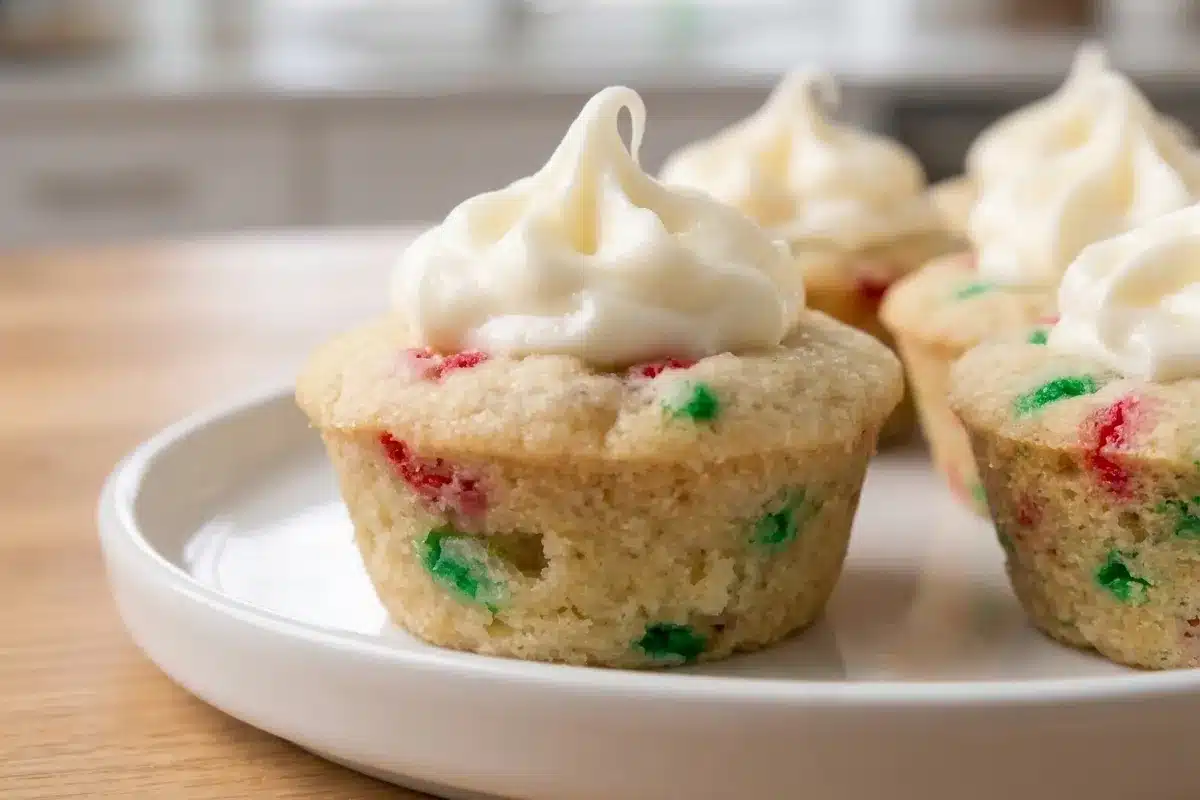
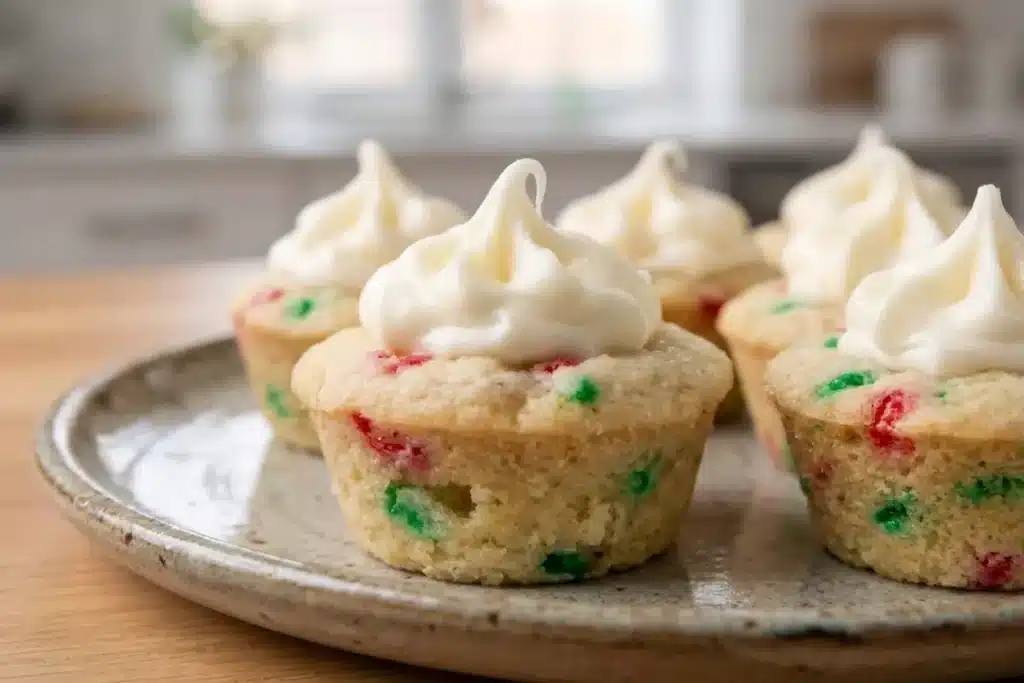
These shortcut Christmas sugar cookie cups are decorated with colorful sprinkles and filled with sweet frosting, making them the absolute perfect bite-sized treat for the holidays! Using a simple sugar cookie mix base saves so much time while still delivering a soft, bakery-style cookie that everyone will love.
Table of Contents
The Science Behind Christmas Sugar Cookie Cups
- Lipid-Coated Starch Matrix & Mini-Muffin Confinement: Combining commercial sugar cookie mix (finely milled wheat flour, sucrose, and chemical leaveners) with softened butter (80% to 82% milkfat) and egg lecithin creates a tender, emulsified dough. Baking inside rigid mini-muffin cavities prevents horizontal spreading, forcing the dough upward to form sturdy edible pastry walls.
- Post-Bake Thermal Compression: Chemical leaveners release carbon dioxide ($CO_2$) during baking at 350°F (175°C), puffing up the cookie centers. Pressing the hot centers immediately out of the oven collapses the trapped air pockets while the starches and sucrose are still warm and pliable, locking in a deep, structured well as the cookie cools.
- Carnauba Wax & Vegetable Fat Sprinkle Stability: Slender rod-shaped jimmies contain a thin outer coating of carnauba wax and vegetable shortening. Unlike water-soluble nonpareils or sanding sugars, jimmies resist dissolving into the wet dough matrix, preventing artificial dye bleeding during mixing and baking.
| Prep Time | Bake Time | Cooling Time | Total Time | Yield | Category |
| 15 mins | 12–14 mins | 30 mins | ~1 hr | 24 cookie cups | Holiday Cookies / Cookie Cups & Tarts |
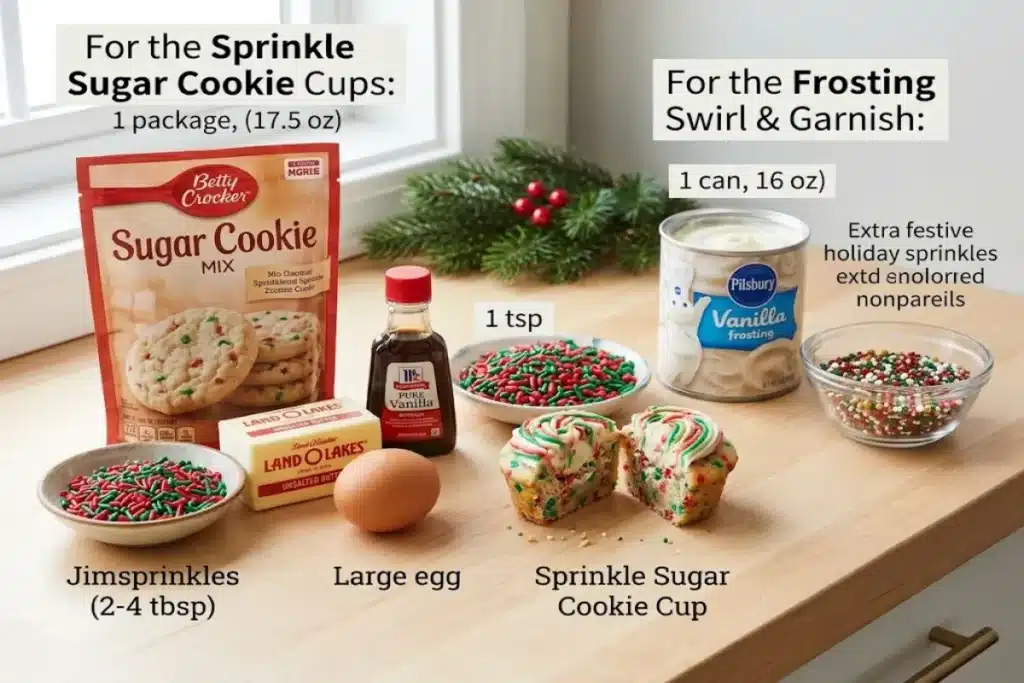
Ingredients
For the Sprinkle Sugar Cookie Cups:
- 1 package (17.5 oz / 496 g) sugar cookie mix
- 1/2 cup (1 stick / 113 g) unsalted butter, softened to room temperature
- 1 large egg, room temperature
- 1 tsp pure vanilla extract
- 2–4 tbsp red and green jimmies (rod-shaped sprinkles)
For the Frosting Swirl & Garnish:
- 1 can (16 oz / 454 g) vanilla frosting (or homemade vanilla buttercream)
- Optional Garnish: Extra red and green jimmies or festive holiday sprinkles
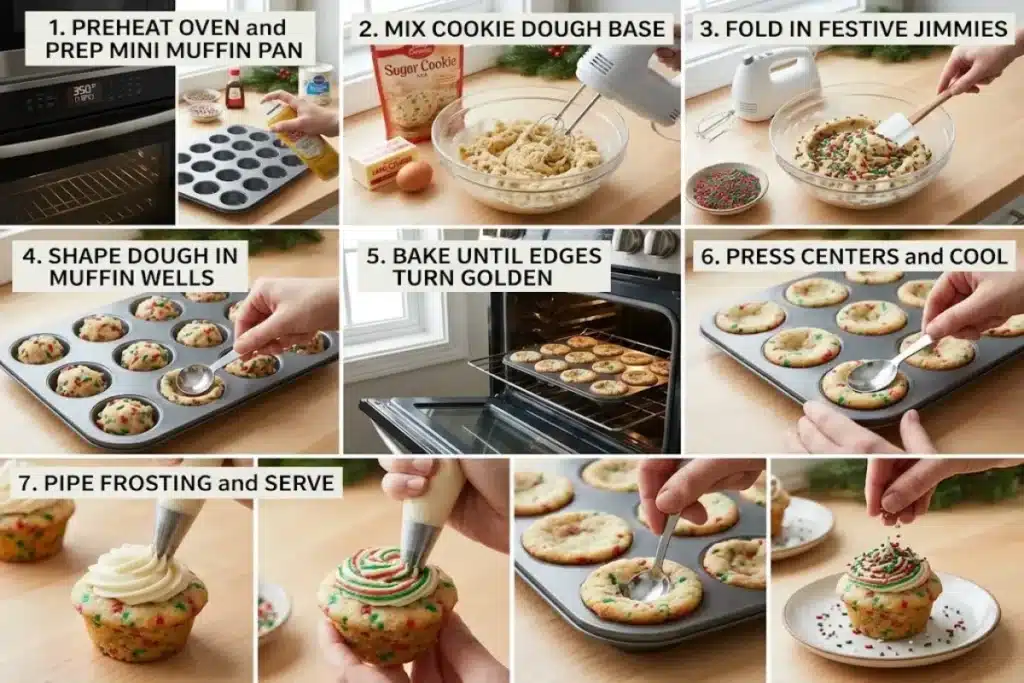
Step-by-Step Instructions
1.Preheat Oven and Prep Mini Muffin Pan:
Preheat your oven to 350°F (175°C) and thoroughly spray a 24-well mini muffin pan with nonstick cooking spray so the baked cups release cleanly.
2.Mix Cookie Dough Base:
In a large mixing bowl, beat 1 package sugar cookie mix, 1/2 cup softened unsalted butter, 1 room-temperature egg, and 1 teaspoon vanilla extract on medium speed until well-combined into a soft, cohesive dough.
3.Fold in Festive Jimmies:Use rod-shaped jimmies rather than nonpareils to prevent dye bleeding.
Add 2 to 4 tablespoons of red and green jimmies and mix on low speed (or fold gently with a spatula) just until evenly distributed throughout the dough.
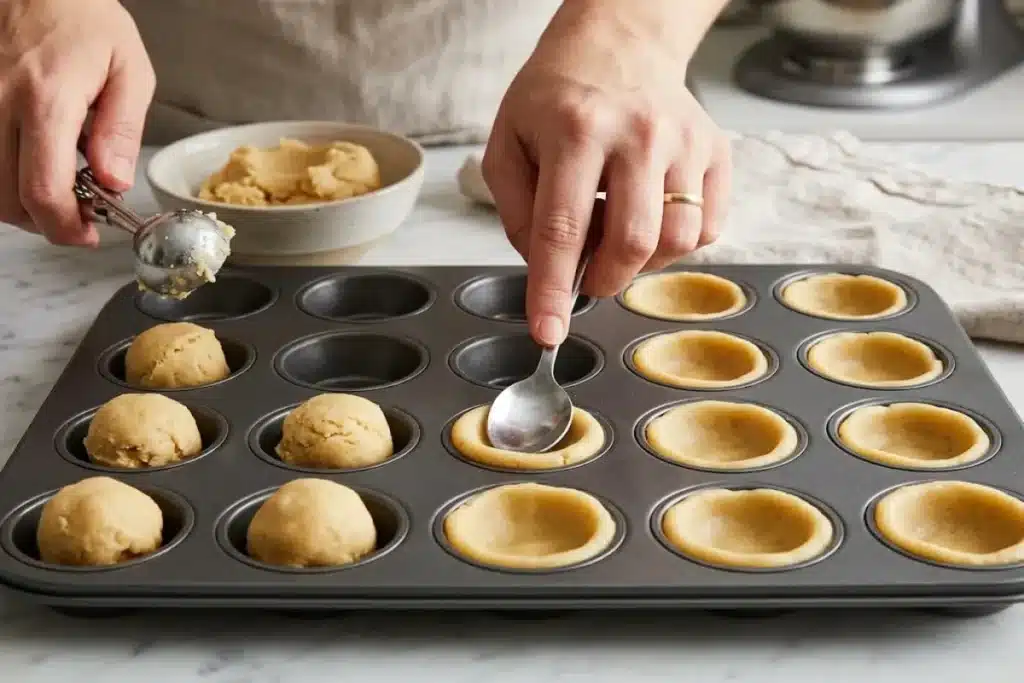
4.Shape Dough in Muffin Wells:
Scoop level tablespoon-sized portions (~20g each) of dough into the 24 mini muffin wells. Use your fingers or the back of a small rounded spoon to gently press a shallow depression into the center of each ball to form a cup shape.
5.Bake Until Edges Turn Golden:Remove while centers are still slightly soft so they don’t over-brown.
Bake at 350°F for 12 to 14 minutes, or until the outer edges are just turning light golden brown. The centers will remain soft and will have puffed up during baking.
6.Press Centers and Cool:Press the puffed centers within 1 minute of leaving the oven while pliable.
Remove the pan from the oven and immediately use the rounded back of a teaspoon to gently press down the puffed centers while the cookies are hot. Let the cookie cups cool in the pan for 20 minutes to firm up before transferring to a wire rack to cool completely.
7.Pipe Frosting and Serve:
Once the cookie cups are 100% cool to the touch, transfer the vanilla frosting into a piping bag fitted with an open star tip. Pipe a decorative swirl of frosting into each cookie cup and top with extra festive sprinkles before serving!
Pro Tips for Baking Success
- Choose Jimmies Over Nonpareils: Always fold baking-safe jimmies (the slender, rod-shaped sprinkles) into cookie dough. Tiny round nonpareils and coarse sanding sugars melt in the oven and bleed streaks of food dye into the batter.
- Press Wells Immediately After Baking: Don’t wait for the pan to cool before pressing down the centers—once the sugar and butter fats cool and solidify, pressing them will crack the cookie walls.
- Zip-Top Piping Bag Hack: No pastry bag on hand? Spoon your vanilla frosting into a heavy-duty zip-top freezer bag, push the air out, snip a 1/2-inch corner off the bottom, and pipe smooth swirls straight into the cups.
Frequently Asked Questions
What are some common questions about cookies?
Home bakers most frequently ask why cookies spread too flat (butter was too warm or the pan was hot), how to keep baked cookies soft (store in an airtight container with a slice of white bread), how to prevent burnt bottoms (use light-colored aluminum pans lined with parchment), and whether cookie dough can be frozen ahead (yes, up to 3 months).
Why are sugar cookies associated with Christmas?
Sugar cookies trace back to 18th-century Moravian Protestant settlers in Nazareth, Pennsylvania, who adapted traditional European butter and spice pastry recipes into crisp, rolled, and cut-out shapes using festive holiday cookie cutters. Because white refined sugar and butter were historically expensive luxury ingredients, baking them was reserved for major religious celebrations like Christmas.
What are some good fillings for sugar cookie cups?
Beyond classic vanilla buttercream, sugar cookie cups are delicious filled with cream cheese frosting, chocolate ganache, lemon curd, salted caramel sauce, peppermint white chocolate mousse, or cherry and apple pie fillings.
What are some interesting facts about Christmas cookies?
- Ancient Solstice Origins: Holiday cookie traditions evolved from medieval winter solstice celebrations, when bakers first gained access to imported spices like cinnamon, nutmeg, and ginger.
- Leaving Cookies for Santa: The American tradition of leaving milk and cookies for Santa Claus became widespread during the Great Depression in the 1930s, when parents encouraged children to show gratitude and generosity even during hard economic times.
- First Cookie Cutters: Early European cookie cutters were handcrafted by tinsmiths into stars, angels, and animals specifically to hang on Christmas trees as edible ornaments.

Christmas Sugar Cookie Cups
- Total Time: 49 minutes
- Yield: 24 cookie cups 1x
Description
These Christmas Sprinkle Sugar Cookie Cups are soft, buttery, and filled with festive red and green sprinkles. Each little sugar cookie cup is baked in a mini muffin pan, shaped with a sweet center, and finished with a beautiful swirl of creamy vanilla frosting. They’re easy to make, perfect for Christmas parties, holiday cookie trays, and festive celebrations!
Ingredients
- 1 package (17.5 oz / 496 g) sugar cookie mix
- 1/2 cup (1 stick / 113 g) unsalted butter, softened to room temperature
- 1 large egg, room temperature
- 1 tsp pure vanilla extract
- 2–4 tbsp red and green jimmies (rod-shaped sprinkles)
- 1 can (16 oz / 454 g) vanilla frosting or homemade vanilla buttercream
- Extra red and green jimmies or festive holiday sprinkles, for optional garnish
Instructions
- Preheat the oven to 350°F (175°C) and thoroughly spray a 24-well mini muffin pan with nonstick cooking spray.
- In a large mixing bowl, beat the sugar cookie mix, softened unsalted butter, room-temperature egg, and vanilla extract on medium speed until well combined into a soft, cohesive dough.
- Add 2 to 4 tablespoons of red and green jimmies and mix on low speed, or fold gently with a spatula, just until evenly distributed throughout the dough.
- Scoop level tablespoon-sized portions of dough, approximately 20 g each, into the 24 mini muffin wells.
- Use your fingers or the back of a small rounded spoon to gently press a shallow depression into the center of each ball to form a cup shape.
- Bake at 350°F for 12 to 14 minutes, or until the outer edges are just turning light golden brown. The centers will remain soft and will have puffed up during baking.
- Remove the pan from the oven and immediately use the rounded back of a teaspoon to gently press down the puffed centers while the cookies are still hot and pliable.
- Let the cookie cups cool in the pan for 20 minutes to firm up before transferring them to a wire rack to cool completely.
- Once the cookie cups are completely cool, transfer the vanilla frosting into a piping bag fitted with an open star tip.
- Pipe a decorative swirl of frosting into each cookie cup.
- Top with extra festive sprinkles before serving.
Notes
Use baking-safe jimmies rather than tiny round nonpareils or coarse sanding sugar, as these can melt and bleed food dye into the cookie dough. Press the centers down immediately after baking while the cookies are still hot and pliable. Waiting until the cookies cool can cause the cookie walls to crack. Make sure the cookie cups are completely cool before adding frosting. If you don’t have a piping bag, spoon the vanilla frosting into a heavy-duty zip-top freezer bag, push out the air, snip a 1/2-inch corner, and pipe smooth swirls directly into the cups.
- Prep Time: 15 minutes
- Cook Time: 14 minutes
- Category: Dessert
- Method: Baking
- Cuisine: American
Nutrition
- Serving Size: 1 cookie cup
- Calories: 185
- Sugar: 17g
- Sodium: 125mg
- Fat: 9g
- Saturated Fat: 4g
- Unsaturated Fat: 4g
- Trans Fat: 0g
- Carbohydrates: 25g
- Fiber: 0g
- Protein: 2g
- Cholesterol: 20mg