

These rich and creamy Butterfinger Truffles are the ultimate no-bake dessert for peanut butter lovers! Packed with crunchy candy bits and mini chocolate chips, these sweet bite-sized treats are perfect for holiday candy trays or easy homemade gifting.
Table of Contents
The Science Behind Chocolate-Covered Butterfinger Truffles
- Lipid-Sucrose Emulsion & Cornstarch Structuring: Creaming peanut butter (roasted peanut oils and emulsifiers) with softened salted butter (80% to 82% milkfat) and powdered sugar creates a smooth, moldable fat-and-sugar matrix. The ~3% cornstarch in powdered sugar absorbs excess peanut oil, giving the truffle center structure without baking.
- Hygroscopic Sugar-Glass Protection: Butterfinger bits consist of flaky layers of roasted peanut butter and brittle, spun sugar glass (sucrose and corn syrup). Folding these crunchy pieces into a high-fat peanut butter paste coats them in hydrophobic lipids, protecting the sugar glass from moisture so it stays crisp rather than turning chewy.
- Thermal Gradient Enrobing & Vegetable-Fat Setting: Freezing the rolled peanut butter spheres at 0°F (-18°C) solidifies the peanut and dairy fats so they resist melting when submerged in warm chocolate. Chocolate almond bark uses stabilized vegetable fats (palm kernel oil) instead of pure cocoa butter, allowing the shell to solidify rapidly into a snappy, glossy coat upon contact with the frozen centers without requiring tempering.
| Prep Time | Chill & Freeze Time | Total Time | Yield | Category |
| 20 mins | 1 hr 15 mins | ~1 hr 35 mins | ~20–24 truffles | Holiday Confections / No-Bake Truffles |
Ingredients
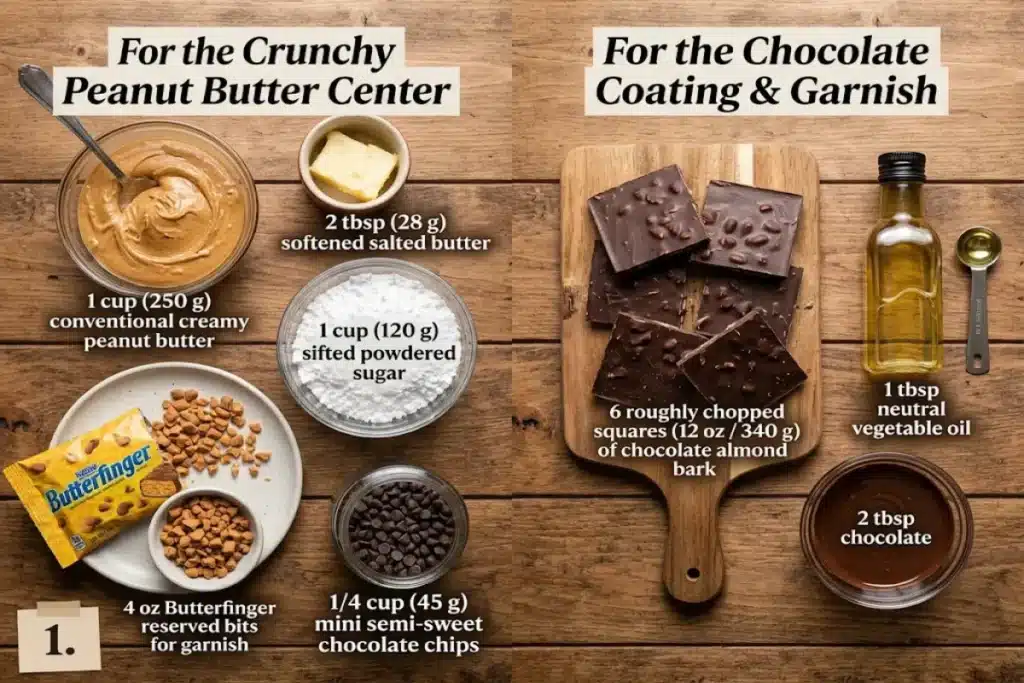
For the Crunchy Peanut Butter Center:
- 1 cup (250 g) conventional creamy peanut butter
- 2 tbsp (28 g) salted butter, softened to room temperature
- 1 cup (120 g) powdered sugar, sifted
- 4 oz (approx. 3/4 cup / 115 g) Butterfinger baking bits or crushed candy bars (reserve 1–2 tbsp for garnish)
- 1/4 cup (45 g) mini semi-sweet chocolate chips
For the Chocolate Coating & Garnish:
- 6 squares (approx. 12 oz / 340 g) chocolate almond bark, roughly chopped
- 1 tbsp neutral vegetable or coconut oil (optional, for thinning)
- 2 tbsp additional melted chocolate (for drizzling)
Step-by-Step Instructions
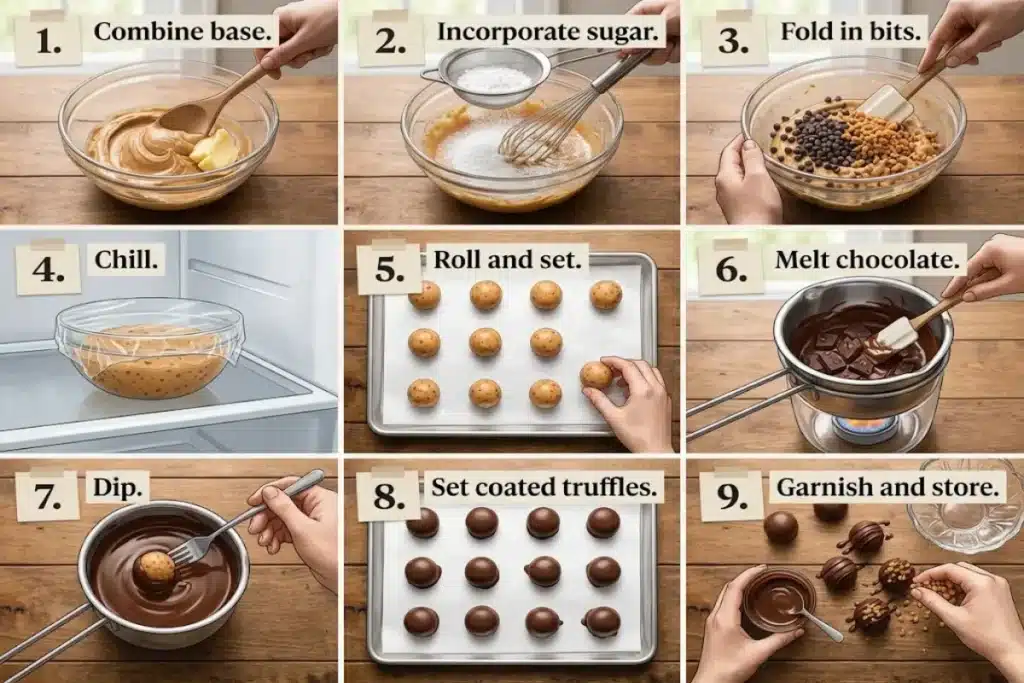
Cream Peanut Butter and Butter: In a medium mixing bowl, beat 1 cup creamy peanut butter and 2 tablespoons softened salted butter together with a hand mixer or sturdy spatula until completely smooth and creamy.
Incorporate Powdered Sugar: Gradually add 1 cup sifted powdered sugar, mixing thoroughly until fully incorporated into a soft, cohesive dough.
Fold in Mix-Ins: Gently fold in 1/4 cup mini chocolate chips and most of the Butterfinger bits, reserving 1 to 2 tablespoons of the crushed candy for garnishing later.
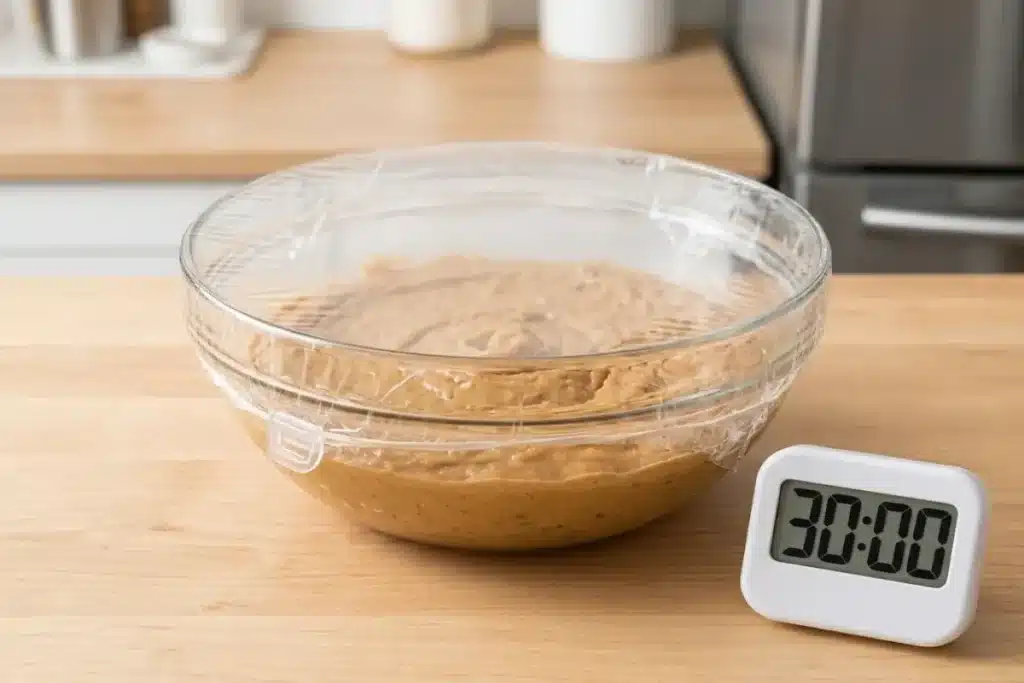
Chill the Filling: Cover the bowl with plastic wrap and refrigerate for 30 minutes so the peanut butter mixture firms up enough to scoop cleanly.
Shape and Freeze Spheres: Scoop the chilled filling into 1-tablespoon portions, roll them gently between your palms into smooth balls, and arrange them on a parchment-lined baking sheet. Transfer the sheet to the freezer for about 30 minutes until the centers are very firm.
Melt Chocolate Almond Bark: Place 6 squares of chopped chocolate almond bark in a dry, microwave-safe bowl. Heat in 30-second intervals, stirring well after each burst until smooth and glossy (stir in 1 tablespoon neutral oil if needed for a thinner dipping consistency).
Dip Frozen Truffles: Working with just a few frozen centers at a time (keep the rest in the freezer), balance one truffle on a fork and spoon the warm melted chocolate over the top and sides. Let excess chocolate drip back into the bowl without tapping the fork, then slide the truffle onto the parchment paper.
Harden Coating: Refrigerate the dipped truffles for 10 to 15 minutes until the chocolate shell is completely firm.
Drizzle, Garnish, and Set: Drizzle the chilled truffles with the additional melted chocolate and immediately sprinkle the reserved Butterfinger bits over the top before the drizzle sets. Chill once more for 5 to 10 minutes until set, then serve!
Pro Tips for Cooking Success
- Freeze the Centers Before Dipping: Because creamy peanut butter has a low melting point, freezing the rolled centers for a full 30 minutes is essential so they hold their round shape in warm melted chocolate.
- Work in Small Batches: Pull only 4 to 5 frozen peanut butter balls from the freezer at a time while dipping—if the centers warm up too much, they can soften into the chocolate bowl.
- Store Chilled for Best Texture: Keep finished truffles in an airtight container in the refrigerator so the peanut butter centers stay firm and the Butterfinger bits stay crisp.
Frequently Asked Questions
What is Butterfinger chocolate?
A Butterfinger candy bar features a crisp, flaky, peanut-buttery spun sugar core coated in a smooth milk chocolatey confectionary coating, known for its signature crunchy, shattering texture and sweet-salty peanut flavor.
How long do chocolate truffles stay fresh?
Stored in an airtight container separated by parchment paper, homemade peanut butter and Butterfinger truffles stay fresh for up to 2 weeks in the refrigerator or up to 3 months in the freezer (thaw in the fridge overnight before serving).
How do you make Butterfinger truffles?
To make no-bake Butterfinger truffles, beat 1 cup creamy peanut butter with 2 tbsp softened butter and 1 cup powdered sugar, fold in crushed Butterfinger bits and mini chocolate chips, chill for 30 minutes, roll into balls and freeze for 30 minutes, then coat in melted chocolate almond bark and top with extra chocolate drizzle and candy bits.
What allergens are in Butterfinger candy bars?
Standard Butterfinger candy bars contain peanuts, milk, and soy (from soy lecithin), and depending on manufacturing facilities may carry cross-contact warnings for tree nuts and wheat—always check the specific package label if baking for guests with severe food allergies.
Print
Chocolate-Covered Butterfinger Truffles
- Total Time: 1 hour 35 minutes
- Yield: 24 truffles 1x
Description
These Butterfinger Peanut Butter Truffles are packed with creamy peanut butter, crunchy Butterfinger bits, and mini chocolate chips, all wrapped in a smooth chocolate almond bark coating. Each bite has the perfect mix of sweet, salty, creamy, and crunchy. They’re easy to make ahead and perfect for holiday trays, parties, or whenever you’re craving a chocolate-peanut butter treat!
Ingredients
- 1 cup (250 g) conventional creamy peanut butter
- 2 tbsp (28 g) salted butter, softened to room temperature
- 1 cup (120 g) powdered sugar, sifted
- 4 oz (approximately 3/4 cup / 115 g) Butterfinger baking bits or crushed candy bars, plus 1–2 tbsp reserved for garnish
- 1/4 cup (45 g) mini semi-sweet chocolate chips
- 6 squares (approximately 12 oz / 340 g) chocolate almond bark, roughly chopped
- 1 tbsp neutral vegetable or coconut oil (optional, for thinning)
- 2 tbsp additional melted chocolate, for drizzling
Instructions
- In a medium mixing bowl, beat the creamy peanut butter and softened salted butter together with a hand mixer or sturdy spatula until completely smooth and creamy.
- Gradually add the sifted powdered sugar, mixing thoroughly until fully incorporated into a soft, cohesive dough.
- Gently fold in the mini chocolate chips and most of the Butterfinger bits, reserving 1 to 2 tablespoons of the crushed candy for garnishing later.
- Cover the bowl with plastic wrap and refrigerate for 30 minutes so the peanut butter mixture firms up enough to scoop cleanly.
- Scoop the chilled filling into 1-tablespoon portions, roll gently between your palms into smooth balls, and arrange them on a parchment-lined baking sheet. Transfer the sheet to the freezer for about 30 minutes until the centers are very firm.
- Place the chopped chocolate almond bark in a dry, microwave-safe bowl. Heat in 30-second intervals, stirring well after each burst until smooth and glossy. Stir in the neutral oil if needed for a thinner dipping consistency.
- Working with just a few frozen centers at a time, balance one truffle on a fork and spoon the warm melted chocolate over the top and sides. Let excess chocolate drip back into the bowl without tapping the fork, then slide the truffle onto the parchment paper.
- Refrigerate the dipped truffles for 10 to 15 minutes until the chocolate shell is completely firm.
- Drizzle the chilled truffles with the additional melted chocolate and immediately sprinkle the reserved Butterfinger bits over the top before the drizzle sets. Chill once more for 5 to 10 minutes until set, then serve.
Notes
- Freeze the Centers Before Dipping: Freeze the rolled centers for a full 30 minutes so they hold their round shape in the warm melted chocolate.
- Work in Small Batches: Pull only 4 to 5 frozen peanut butter balls from the freezer at a time while dipping. If the centers warm up too much, they can soften into the chocolate bowl.
- Store Chilled for Best Texture: Keep finished truffles in an airtight container in the refrigerator so the peanut butter centers stay firm and the Butterfinger bits stay crisp.
- Prep Time: 35 minutes
- Cook Time: 0 minutes
- Category: Dessert
- Method: No-Bake
- Cuisine: American
Nutrition
- Serving Size: 1 truffle
- Calories: 190
- Sugar: 16 g
- Sodium: 95 mg
- Fat: 13 g
- Saturated Fat: 5 g
- Unsaturated Fat: 7 g
- Trans Fat: 0 g
- Carbohydrates: 17 g
- Fiber: 1 g
- Protein: 3 g
- Cholesterol: 5 mg